Mounting and Imaging
Since every imaging system is different, it is difficult to devise a singular mounting protocol for every setup. However, the following requirements always apply:
1. The sample must have the same Refractive Index (RI) as the imaging medium.
2. The sample must be immobilized so it does not move during imaging.
3. We previously recommended filling the imaging chamber with EasyIndex. We now recommend using EasyIndex Matched Immersion Oil. We highly recommend using EasyIndex Matched Immersion Oil instead of EasyIndex to fill your imaging chamber when imaging samples that have been index matched with EasyIndex. Water at the surface of EasyIndex in the imaging chamber evaporates producing wave-like changes in refractive index at the surface in a matter of minutes, which can negatively impact imaging quality. By using EasyIndex Matched Immersion Oil instead of EasyIndex in your imaging chamber, it will be cheaper, it will last longer, there will be no evaporation, and you will not need to wipe the objective lens between sample changes.
- If you are still imaging in EasyIndex, cover the surface of the liquid with a layer of mineral oil to prevent evaporation of water based EasyIndex.
- As you switch from EasyIndex to EasyIndex Matched Immersion Oil, make sure to clean the chamber following this protocol.
It is possible to glue the sample to a holder to immobilize it. However, the glue will interfere with imaging in those planes and can damage the sample for future imaging. To avoid this, it is possible to embed the sample in agarose gel made of EasyIndex.
This following protocol is recommended for use with SmartSPIM. Other light sheet microscopes may require different mounting procedures to be compatible with different imaging orientations.
Reagents/Equipment Required
- EasyIndex – RI = 1.52 – stored at RT in sealed container
- For this protocol, it is necessary to use the 1.52 RI version of EasyIndex.
- EasyIndex Matched Immersion Oil
- Ultra-Low Agarose: Sigma Aldrich A2576
- Thermal Strips/Wellplate covers: ThermoFisher AB0558 (recommended)
- Light pad, lamp
Protocol
1. Combine ultra low melting point agarose (Sigma A5030) with EasyIndex in a falcon tube to a final concentration of 2% agarose (for example: 0.6 g in 30 mL). It is best to mix together larger volumes (~20 mL) for more accurate percentages.
2. Wait a few hours for the agarose particles to be fully hydrated. This can be stored in the fridge for later use.
[Note] If the particles are not hydrated the sides of the falcon tube will have visible chunks of agarose.
3. Shake the solution well and pour the amount you need into a smaller centrifuge tube, storing any remaining solution in the fridge. You will need about 5 mL per sample.
4. Place the vial in a water bath at 90°C for about 30 minutes.
5. Once the gel has started to melt, mix it by inverting the tube several times to ensure homogenous melting of the agarose particles. Don’t worry about introducing any bubbles. The tube and gel will be very hot so handle with care.
6. Once the gel is well mixed, return the tube to the water bath for at least another 30 minutes.
7. When the gel is ready it should be fully clear. A good way to check is by looking at something through the gel. There should be no distortion or any streaky lines. If your gel still has bubbles at this point, you can leave it in the bath for a bit longer or centrifuge it for a few minutes.
8. Reduce the temperature of the bath to 70°C so it can be handled.
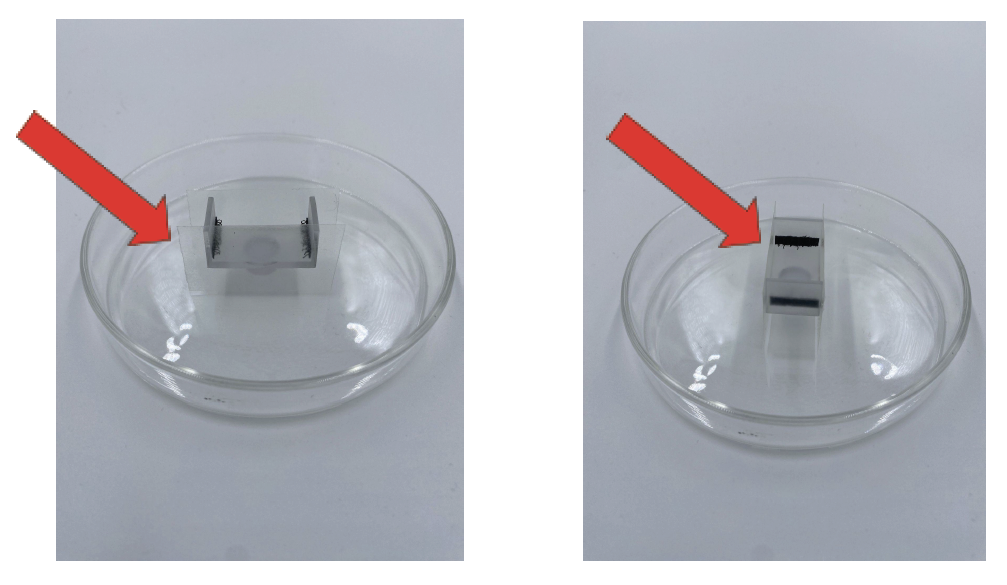
9. Prepare your sample holder. In the case of SmartSPIM, add thermal seal strips, slices of sticky well plate covers, or blu-tack to the sides to form walls. See the image below.
10. Pour the prepared gel slowly into the sample holder, filling the holder so there is a layer about 6-7mm deep. This is roughly 2/3 the height of the standard mouse brain holder.
11. Examine the gel and carefully pipette out any bubbles that might arise after pouring. We recommend using a light/small lamp and a light pad to help see bubbles.
12. Slowly slide the sample into the gel using a spatula or spoon.
13. Examine the sample under a direct light and pipette out any bubbles in the gel.
14. If there are any internal bubbles that cannot be easily accessed via ventricles, use a small gauge needle to aspirate the bubbles. To do so, first cover the sample in EasyIndex, then insert the needle and draw out the bubble. If the sample is not submerged, the bubble may fill up with air again when the needle is removed.
[Note] When using a needle for aspiration, you inherently introduce small damages to the tissue; however, leaving bubbles inside the sample or gel will grossly impact imaging quality.
15. Place the holder at 4°C for at least 15 minutes. Put the tube of agarose gel back in the water bath.
16. Once the gel has set, take the sample out of the fridge.
17. Add a small top layer of gel to the top of the mold. This will ensure no part of the brain/tissue is sticking out of the agarose.
18. Carefully pipette out any bubbles that may be in the top liquid layer.
19. Return the sample to 4°C for an hour.
20. After an hour, carefully remove the thermal tape/blue tack from the holder and return the mounted sample back into EasyIndex.
21. For best imaging quality, we recommend incubating the sample in the EasyIndex overnight, shaking, at 37°C .
22. Before imaging in EasyIndex Matched Immersion Oil, briefly wash the sample with the Oil for ~10 minutes prior to imaging to remove excess EasyIndex.
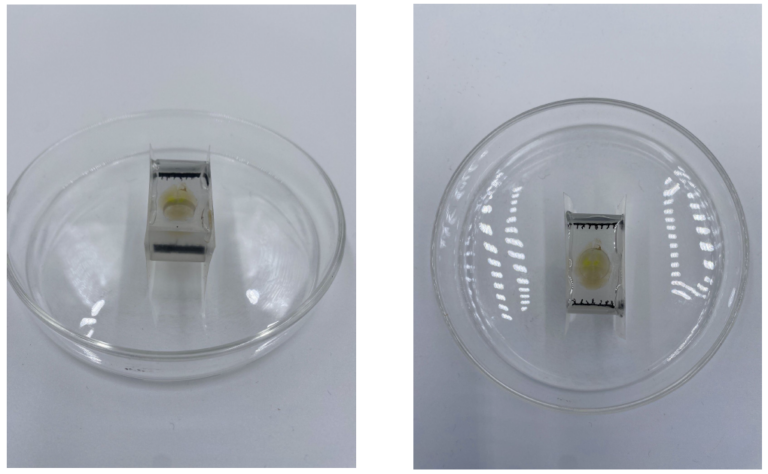
Below is an example of a fully mounted sample. Please review the video as well.