Judging tissue clearing progression
New to tissue clearing?
If so, you are in the right place! This guide will walk you through the tissue processing journey step by step. The general protocol for tissue clearing with LifeCanvas products follows the outline shown below:
First, to ensure the sample retains endogenous fluorescence, protein antigenicity, and structural integrity throughout the clearing process, the tissue needs to be preserved beyond simple PFA fixation. There are many preservation techniques, but SHIELD is the most robust technique currently available and can be easily applied via either a perfusion or post-fixation step.
Second, the tissue needs to be delipidated – this is generally referred to as the clearing step. Light-scattering lipid membranes in the tissue prevent deep penetration of light as they create refractive index mismatches that limit imaging depth. Delipidation allows for imaging of whole organs without sectioning, and is achieved by introducing the detergent SDS to the sample at elevated temperatures. Clearing can be done passively or can be sped up significantly using electrophoretic methods, like those used in our SmartBatch+. The SmartBatch+ is a batch processing tissue clearing and labeling device that allows for significantly faster, easier, and more reliable tissue clearing vs. passive methods, all with higher throughput.
Next, specific targets of interest in the sample can be labeled with molecular probes, allowing for targeted analysis of specific proteins, structural markers, cell populations, and more. Small samples can be stained with passive methods, but larger, whole organ samples are more difficult to label homogeneously and take a long time to label (several weeks). Our SmartBatch+ device uses stochastic electrotransport technology (Kim, PNAS, 2015) combined with eFLASH (Kim, bioRxiv, 2019) to increase the speed of labeling to just 24 hours. For more information, please visit our Technology page.
After delipidation and optional labeling, the sample must then be index matched. Even after removing the lipids, the sample will appear translucent – not transparent – due to the refractive index mismatch between the sample and surrounding fluid. A simple incubation in EasyIndex with gentle shaking will match the refractive index and render the sample optically transparent. For new users of EasyIndex, it is important to shake the bottle well before use.
Once the sample has been properly index matched it can be imaged intact. Some examples of appropriate imaging modalities are confocal, two-photon, and light-sheet microscopy. In general, light-sheets are better suited for large format, whole-organ imaging. LifeCanvas’s SmartSPIM is optimized for resolution, speed, and flexibility for large, cleared samples and can image a mouse brain hemisphere at high resolution in just ~20 minutes per imaging channel.
Go-to kit for easy and reliable passive clearing
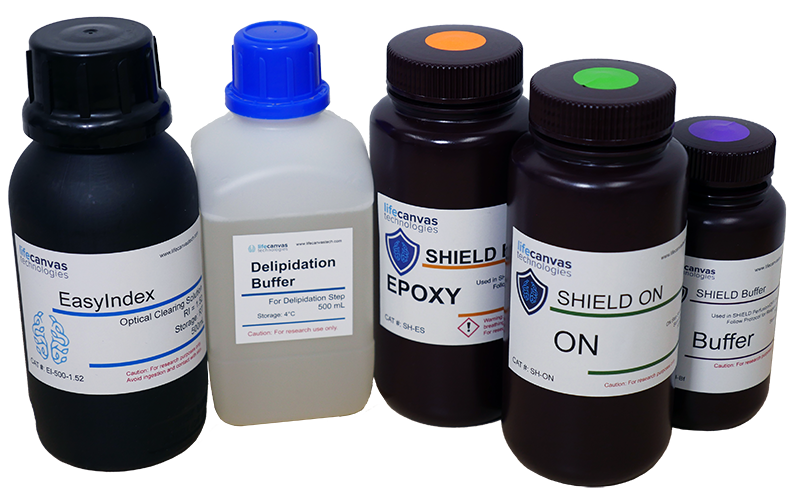
To make your first trial of clearing as easy and seamless as it can be, we are introducing a Passive Clearing Kit that contains a SHIELD preservation kit, Passive Clearing Buffer, and EasyIndex. This is everything you will need to perform the our entire preservation-clearing-matching protocol and makes it as easy as possible to evaluate and adopt the pipeline and start generating the 3D datasets you need to answer your most pressing research questions.
How to judge clearing progress and common misconceptions
For beginners, one of the most common misconceptions about clearing is what a sample should look like after it has been cleared. To achieve optimal results, it is critical to understand when a sample is fully cleared, and this is not always obvious at first glance.
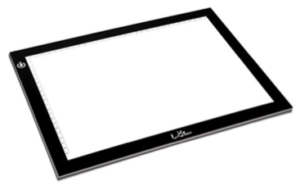
The best way to judge sample clarity is to place the sample above a uniform intensity backlight. A very simple, cheap, and useful tool is an LED tracer. There are many available on Amazon for ~$20. They provide a large, uniform, dimmable backlit surface that is perfect for this application.
It is also helpful to print out a grid, logo, or some text on a transparency and attach it to the tracer. To check a sample’s clarity, simply place it in a petri dish on top of the light box.
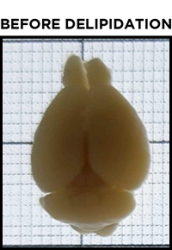
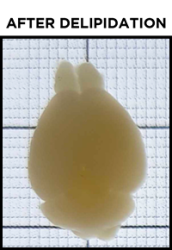
Even after a sample has been fully delipidated, it will not appear fully transparent but rather translucent. Over time, the sample will become more and more translucent, progressing from the outer edges of the sample to its center. When a sample is fully delipidated, the opaque center will have disappeared and the sample will appear homogeneously translucent throughout when placed on the tracer.
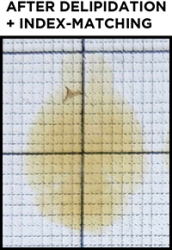
As explained above, the sample does not appear transparent due to the refractive index mismatch between the sample and any clearing buffer or saline solutions, as well as nonuniformities intrinsic to the sample itself. Before finally imaging the sample it must be refractive index-matched. After incubation in EasyIndex, you can again place the sample on the tracer to check its transparency. When doing so, it is best to fully submerge the sample in EasyIndex in a small dish. You should not see any hazy sections of the sample and should be able to easily view the underlying grid, text, or logo. Now you are ready for imaging! If you find your sample has an opaque center even after significant incubation in EasyIndex, you can incubate it in PBS to wash out EasyIndex and then clear it further before index matching again.


